The new AI features for Cloudflare Workers have made deploying your own scalable AI very easy. This article will show you how to get your own ChatGPT-like app running with Cloudflare Workers and Next.js, all while doing it for completely free (for now).
Let's start with creating the Cloudflare Worker to power the AI.
Creating your Cloudflare Worker:
Go to your Cloudflare Dashboard, then the workers tab, then create a blank "Hello World" worker. Don't worry, after creating this, you can edit the worker.js file.
Open the Quick Editor for the Cloudflare Worker, and paste in the following JavaScript.
You can modify the endpoints, add rate limiting, and also the system/user prompts.
import { Ai } from './vendor/@cloudflare/ai.js';

export default {
  async fetch(request, env) {
    //Get the url params and query
    const url = new URL(request.url);
    const queryString = url.searchParams.get('q');

    const tasks = [];

    //Create the AI object
    const ai = new Ai(env.AI);

    //System prompt for the AI, change as you see fit for your use cases. This prompt allows it to be a general-purpose AI assistant.
    let chat = {
      messages: [
        { role: 'system', content: 'You are Inspare AI, a helpful assistant.' },
        { role: 'user', content: queryString }
      ]
    };

    //Run this chat on the 2.7 billion LLaMA model
    let response = await ai.run('@cf/meta/llama-2-7b-chat-int8', chat);

    tasks.push({ inputs: chat, response });

    //Send a response from the Cloudflare Worker
    return new Response(JSON.stringify(tasks), {
      headers: {
        "content-type": "application/json",
        "Access-Control-Allow-Origin": "*",
        "Access-Control-Allow-Methods": "GET,HEAD,POST,OPTIONS"
      }
    })
  }
};
This will create a web server for your Cloudflare Worker, allowing it to respond to prompts.
Creating your Next.js project:
Run the following command to create your Next.js project with JavaScript and Tailwind.
npx create-next-app@latest√ What is your project named? ... workers-ai
√ Would you like to use TypeScript? ... **No** / Yes
√ Would you like to use ESLint? ... **No** / Yes
√ Would you like to use Tailwind CSS? ... No / **Yes**
√ Would you like to use `src/` directory? ... **No** / Yes
√ Would you like to use App Router? (recommended) ... No / **Yes**
√ Would you like to customize the default import alias (@/*)? ... **No** / YesCreating layout.js
The layout.js file is mostly kept standard from create-next-app. This imports the globals.css, needed for Tailwind and Markdown, applies the Inter font, and has a bit of metadata for SEO.
import './globals.css'
import { Inter } from 'next/font/google'

const inter = Inter({ subsets: ['latin'] })

export const metadata = {
  title: 'InspareAI',
  description: 'Inspare Chatbot',
}

export default function RootLayout({ children }) {
  return (
    <html lang="en">
      <body className={inter.className} style={{overflow: "hidden"}}>{children}</body>
    </html>
  )
}
Globals.css edits
This step is important for your Markdown to be properly formatted from the AI, since Tailwind removes all styles from these elements by default.
Make the following addition to your globals.css in order for Markdown to be displayed properly in messages.
.markdown > * {
  all: revert;
}
Message Component
For every message you have with the AI, it needs to be displayed in the user interface.
Create the following function, having props for user and text.
The background of the message will be altered based on what user is currently speaking. If the user is speaking, it will be a darker background, and a lighter one of the AI is speaking. You can change the AI's name from the page component later on, and from the user === 'InspareAI' statement. This is not required, but adds some visual improvement, making it look a bit more like ChatGPT.
function Message({ user, text }) {
  return (
    <div className={(user === 'InspareAI' ? "bg-zinc-100 dark:bg-zinc-800" : "") + " p-8"}>
      <div className='container mx-auto px-10 xl:px-52'>
        <h1 className="font-bold mt-2">
          {user}
        </h1>
        {text}
      </div>
    </div>
  );
}
This solution currently works, but it lacks Markdown support, leaving the messages unstyled.
Install the following NPM package to add Markdown support.
npm install react-markdownAdd Markdown to the top of your file that contains the message component.
import Markdown from 'react-markdown';Now, modify {text} to become:
<Markdown children={text}></Markdown>Chat Component
In addition to the singular message components, the app needs a way to render each message.
Create the Chat component with props for messages. This will take the messages array, and render out each message in the thread.
function Chat({ messages }) {
  return (
    <>
      {messages.map((a, i) => {
        return (
          <Message key={i} user={a.user} text={a.text}></Message>
        );
      })}
    </>
  );
}
Page Component
You now need to put all of these components together to form a final page.
We will now create a page with a basic ChatGPT style interface. I am also using heroicons for React, though they are not required.
Install heroicons with
npm install @heroicons/reactimport { useState, useRef } from 'react';
import { ChatBubbleBottomCenterTextIcon, PlusCircleIcon } from '@heroicons/react/24/outline';
export default function Home() {
const [messages, setMessages] = useState([]);
const text = useRef(null);
return (
<>
<div className="flex dark:bg-zinc-900 dark:text-white overflow-hidden">
<div className="h-screen fixed invisible md:static md:visible md:w-1/6 p-2 bg-zinc-800 text-white border-r dark:border-r-zinc-700">
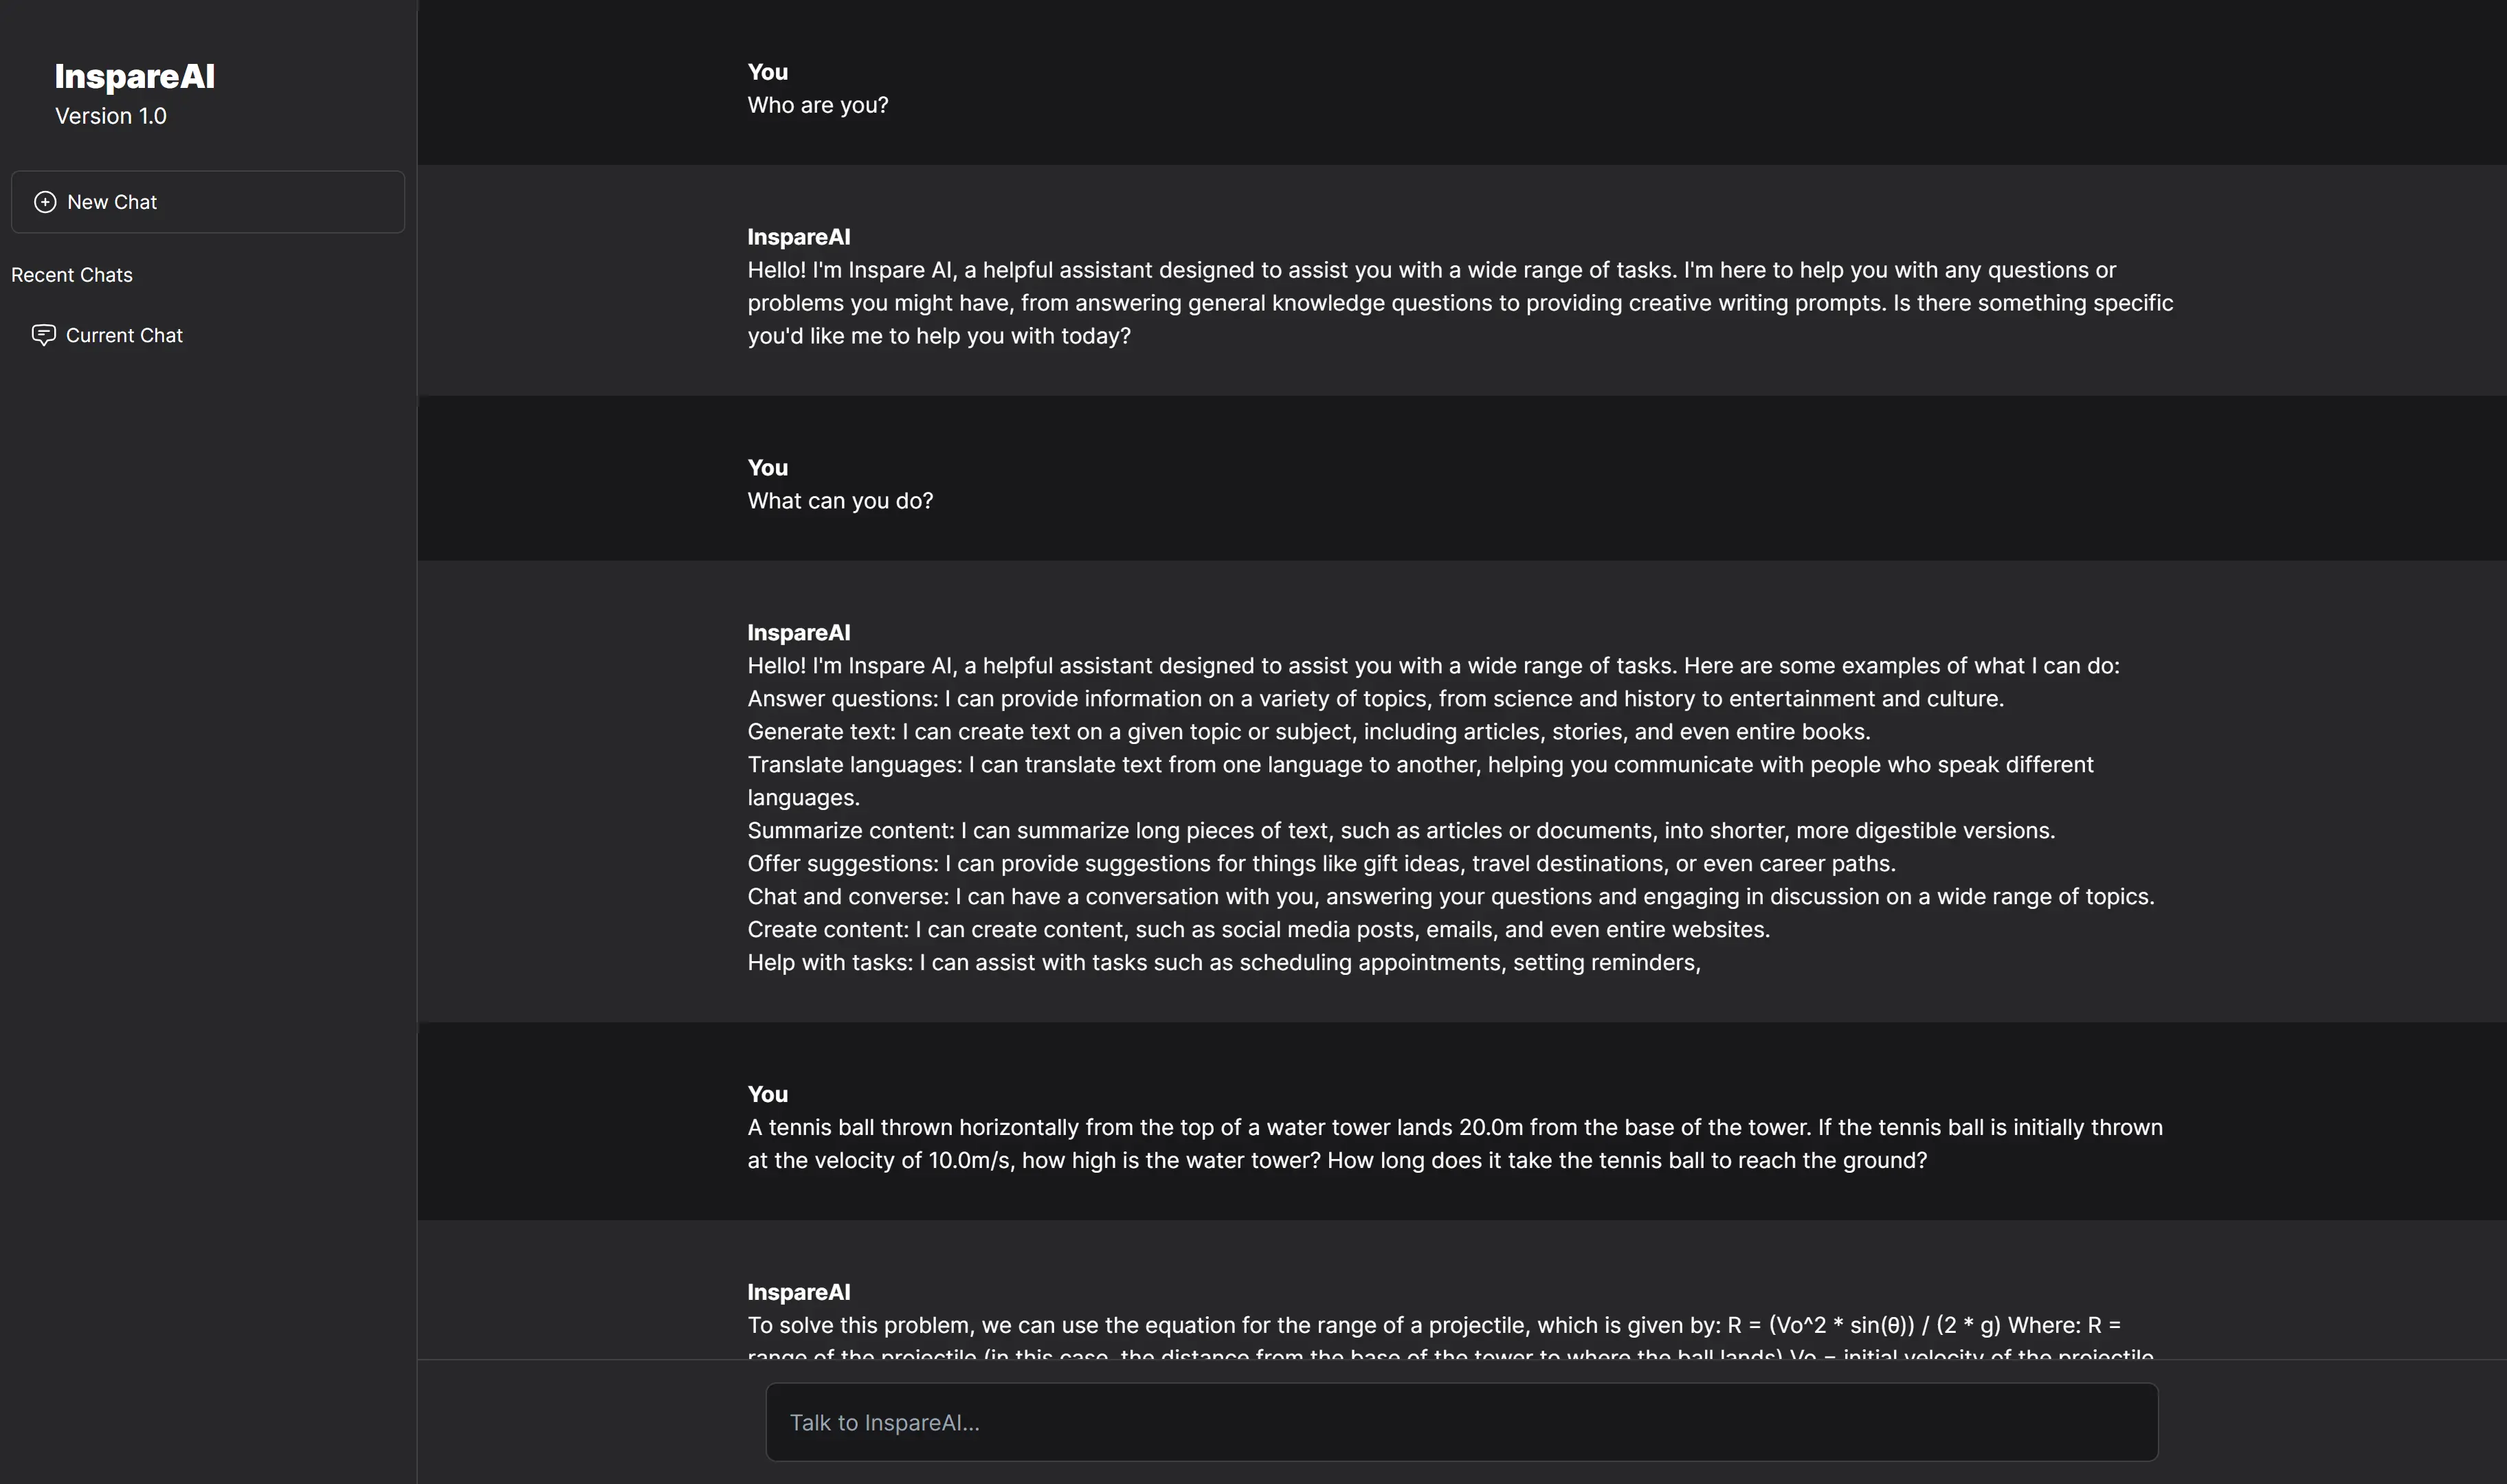
<h1 className="text-2xl font-black p-8 pb-0">InspareAI</h1>
<h1 className="text-base pl-8 pb-4">Version 1.0</h1>
<div>
<button onClick={() => { setMessages([]); }} className="border w-full border-zinc-700 hover:bg-zinc-900 transition-colors rounded-md mt-3 p-3 pl-4 pr-4 text-left text-sm inline-flex">
<PlusCircleIcon className='-ml-0.5 mr-1.5 h-5 w-5'></PlusCircleIcon> New Chat
</button>
<p className="text-muted mt-5 text-sm">Recent Chats</p>
<button className="w-full rounded-md mt-3 pl-4 pr-4 p-3 text-left text-sm inline-flex hover:bg-zinc-900 transition-colors">
<ChatBubbleBottomCenterTextIcon className='-ml-0.5 mr-1.5 h-5 w-5'></ChatBubbleBottomCenterTextIcon>
Current Chat
</button>
</div>
</div>
<div id='chat' className="h-screen md:w-5/6 overflow-auto">
<div className='mb-40'>
<Chat messages={messages}></Chat>
</div>
<div className="absolute bottom-0 w-full md:w-5/6 bg-zinc-100 dark:bg-zinc-800 border-t dark:border-zinc-700">
<input ref={text} id='input_text' placeholder="Talk to InspareAI..." className="w-4/6 p-4 rounded-lg border dark:bg-zinc-900 dark:border-zinc-700 dark:text-white flex justify-center align-center m-auto mt-4 mb-4"></input>
</div>
</div>
</div>
</>
);
}Now, you need to be able to handle sending and receiving messages from the AI. I will create a function called "type," which will be called every time a key is pressed in the input.
async function type(e) {
  //Generate some text whenever the enter key is pressed.
  if (e.keyCode === 13) {
    let value = text.current.value;
    if (!value) return;

    //Create a placeholder message while the AI is generating a response.
    let arr = [...messages, { user: "You", text: value }, { user:"InspareAI", text: "Generating..." }];
    setMessages(arr);

    document.querySelector('#input_text').value = '';
    document.querySelector('#chat').scrollTo(0, document.querySelecto('#chat').scrollHeight);

    //Fetch AI response from the worker
    let res = await fetch(`https://YOUR_WORKER_API/?q=${v}`);
    res = await res.json();

    //Remove the latest placeholder message
    setMessages(messages.slice(0, -2));
    setMessages([...messages, { user: "You", text: v }, { user:"InspareAI", text: res[0].response.response }]);

    document.querySelector('#chat').scrollTo(0, document.querySelecto('#chat').scrollHeight);
  }
}
Now modify your input to have the onKeyDown type.
<input onKeyDown={type}></input>That's It!
You've now successfully created your own AI with Next.js and Cloudflare Workers, and are now free to deploy it to any platform you wish. My preferred choices are Cloudflare Pages and Vercel.
This project is only the barebones AI features, to get things like chat history, you will need to extend this app using a database of your choice.
Publishing to Vercel
Upload your code to a GitHub project, or use my existing one at the bottom of this page.
Then, create a new Vercel project and select your GitHub repository.
Name your Vercel project whatever you would like, and make sure your Framework Preset is set to Next.js. Now press deploy.
Success! If everything has gone correctly, you should now have your own AI service exposed to the internet, for completely free.
The source code for this project is available on my GitHub
If you are impressed with this and want to chat, Contact Me!